
Just wanted to let y'all know that Pear Honey goes wonderfully with cinnamon-ginger pancakes! Yum!

I saw a set of cheater chopsticks that are hinged like a clothespin and I thought, "I can do that!" So I did. And you can too. Easy. Maybe not as easy as the rubberband trick, but a lot cooler. =D
So here's how you hack a set of chopsticks in five easy steps:
1. Get some to-go chopsticks and a clothespin.


I looked at several recipes online and after checking with my mom (an experienced canner) I didn't follow any of the recipes. Here's what I did...
Peeled and cut up a bunch of slightly overripe pears, tossed them (with the peelings) in a really big pot and barely covered them with water. Brought this to a boil and then covered and simmered until the pears were mushy.
Used a potato masher to break up the pears and simmered for about another 20 mintutes. Strained this thru a cotton cloth [flat cotton diapers (not prefold) are great for this and you can by them cheap at Walmart] and measured the resulting liquid.
For the first batch, I had 10 cups. This went into a stainless steel pot and half that amount of sugar was added. So for 10 cups of juice I added 5 cups of sugar. I also added about 1/8 to 1/4 of a cup of lemon juice (to taste) and a teaspoon of vanilla (again, to taste). Brought this to a boil and simmered on med-low until it was as thick I liked. You can test for this by spooning a little on a saucer and sticking it in the fridge to cool down and then see if it is as thick as you want.
For the second batch I had 8 cups of juice so I added 4 cups of sugar, the lemon and vanilla, and it was cooked in the crockpot, on high, with the top off and an cloth draped over it. It took longer to get thick but I didn't have to stand and stir it toward the end, to keep it from burning.
For both batches, as soon as they were ready and still good and hot (keep them on low while you work) I ladled them into hot sterilized jars, wiped the rim, set the lids (these were kept ready in *very* HOT water) and screwed down the rings. Then I put the jars together on a towel and draped another towel over them so they would cool down slowly. Mom always does this and says it helps them seal better. They all sealed perfectly.
So there you have it. Not quite a recipe, but certainly a method you can follow to make your own Pear Honey. And it is SO worth it. Yum! See for yourself.


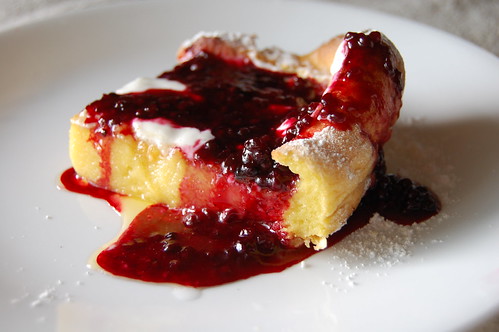
The pear honey turned out worderfully! We had some on French Toast this morning and I have another batch going right now. This time I am trying to make it in the crockpot. I didn't want to stay up cooking it last night and I didn't want to try and find room in the fridge for the juice so I put it in the crockpot and left the top ajar with a towel over it. This morning, I took the top off and carefully draped the towel over the open crock. So we will see if this works.
Meanwhile, here's a recipe for Leftover Oatmeal cake!

Yep, oatmeal cake. Deeeelicious! I tend to think of this recipe as the second half of my crockpot oatmeal recipe. I used to make the oatmeal for the morning and then use the leftovers for this cake for after supper.
 Leftover Oatmeal Cake
Cream together:
1/2 cup butter
2 cups sucanat (OR half white sugar & half brown sugar OR all white sugar plus 1 TBS molasses)
2 eggs
1 tsp of vanilla
2 cups (more or less) cooked oatmeal
Sift together:
1 1/2 cups flour
1 tsp. baking soda
1 tsp. baking powder
1/2 tsp. sea salt
1 tsp. (or more!) cinnamon
Add sifted mixture to creamed mixture and beat well. Pour into greased and floured 9 x 13 cake pan. Bake 35 minutes or until tests done. Add topping.
Topping
Combine:
1/2 cup brown sugar
1/3 cup margarine
1/4 cup cream or milk
1/2 cup chopped nuts
1 cup coconut.
Spread on hot cake and broil 2 - 4 minutes until the topping begins to brown. Watch closely! (I have made the topping without nuts or coconut and it was still great.)
This cake is very rich and moist so serve in small pieces.
I washed, peeled, and cut up some pears this morning. Put them, along with the peels, in a huge pot and covered them with water. I cooked them until they were soft, mashed them, and let them cool. The plan is to make some pear honey and jelly.
I went outside around noon, while the pear mash was cooling, and picked more pears and a few figs. But when I came inside and immediately felt like I was going to throw up and/or pass out. I had gotten too hot without realizing it. Honest, I didn't feel that hot and I wasn't even sweating that much. I took a nap. Now I'm trying to finish the pear honey and get a late supper on the table.
I did not get the fall garden seeds started, nor did I get the garden prepared. The kids pulled the corn stalks out, but appearently, that was as far as it got.
-sigh-
I will let y'all know how the pear honey turns out. I know it is tasting really good so far. But it will be a long night of cooking and canning it. Hopefully I will remember to take pictures if all goes well.... if I mess it up then there doesn't need to be photographic evidence of that, now does there? :)
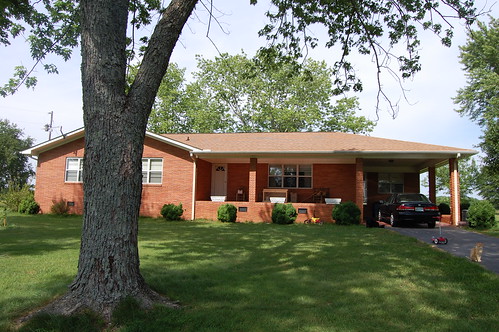
Not the furry kind of mouse. The computer mouse. I started goofing around with a photo of our house using 'Paint', the program the kids use to draw things on the computer. The result is not professional looking by any means. But I was determined not to spend a ton of time on it, like I tend to do when i get obsessed interested in something sometimes. So this was a "get it done", not a "get it perfect" project. Maybe in a few years we will make some of these changes in real life, but for now I thought I would share what I am thinking about for our little brick ranch.
BEFORE....
AFTER....
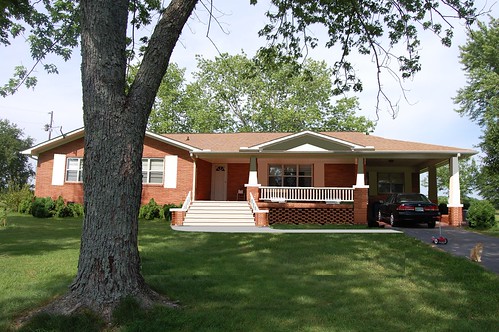
Right now, the steps to the porch are at the side, under the carport. This is very convienient on rainy days, but every time I walk out the front door I think there should be stairs on the front of the porch. It would look more welcoming from the "curb" (we don't have a curb in the country, but you know what I mean) and it would be more convienient when exiting the house to do orchard work --which is to the right as you go out the door. So I want to leave the current steps in place and add some grand front steps.
Also, we have thought about building an addition that would add a master suite and a dining room (not shown in the rendering). This would free up space to do a MUCH needed expansion of the kitchen into the current dining area. The concern with this idea is that we know we would never, ever, be able to find a match for the unique brick the exterior is clad in. So the addition would have to be 'wood' siding, and how do you make that blend with the rest of the house?
My thought is to add more wood to the front of the house so the addition won't look like quite so out of place. That is why I added craftsman-style pillars, a railing, shutters, a gable and chose wood for the steps.
And I would definately add better landscaping than what you see here... but like I said, I was determinded to not obsess.
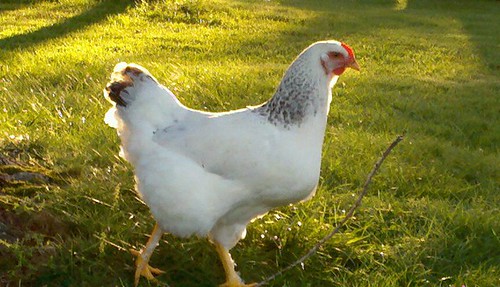
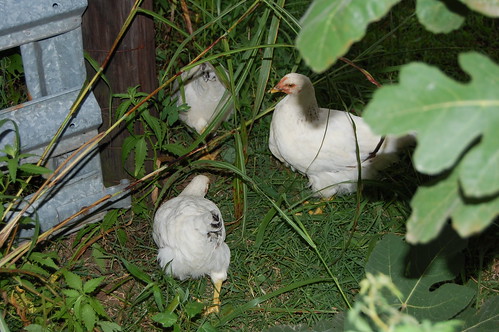
Look at them! They look innocent enough, all cute and clucky, but they are troublemakers I tell you! A group of our youngest chickens have discovered our wonderful, sweet, elderly neighbors' flowerbeds. Bad chickens! Bad! The offenders are caged for now and some decisions about fencing will have to be made tonight. Then the wing clipping will begin. Bad chickens!! [sigh] I can't stay mad at them long.... they are so cute... and rotten!... and cute. [sigh]
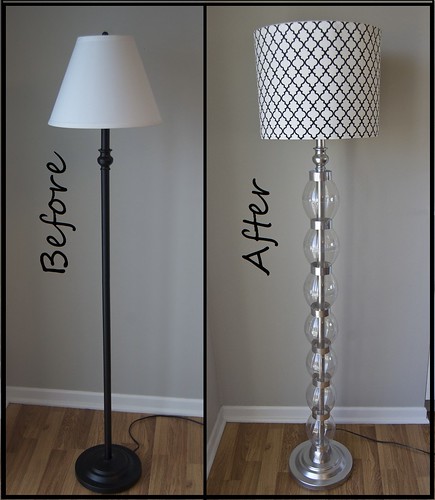
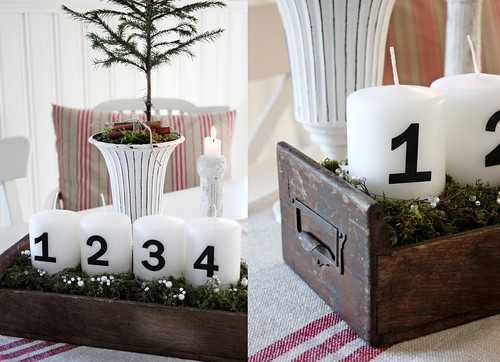
http://matsutakeblog.blogspot.com/2011/03/its-done-glampsformation.html
I like this idea, but I don't haven any card catalog drawers. Maybe I can find an old box about this size.


